


How to Curl Hair With a 3-in-1 Tool for Beginners
Table of Contents
- What a 3-in-1 Tool Actually Does (and Which Design You Have)
- What You'll Need Before You Start Curling Hair
-
How to Use a 3-in-1 Hair Styler: 7 Steps for Beginners
- Step 1: Start With Dry, Detangled Hair
- Step 2: Apply Heat Protectant and Section Your Hair
- Step 3: Set Your Temperature, Wrap, and Hold
- Step 4: Work Section by Section, and Match the Wrap to Your Hair Length
- Step 5: Alternate the Wrap Direction for a Natural Fall
- Step 6: Let Each Curl Cool Completely Before You Touch It
- Step 7: Finger-Comb and Loosen at the Roots
- Temperature Guide: What Heat Setting to Use by Hair Type
- 3-in-1 Hair Styler Attachments: How to Switch and Care for Them
- How to Make Curls Last Longer (and Fix the Ones That Fall)
- Beginner Mistakes That Cause Burns, Frizz, and Droopy Curls
- Conclusion: Your First Curl Session, Start to Finish
- Frequently Asked Questions
Last Updated: October 6, 2026
What a 3-in-1 Tool Actually Does (and Which Design You Have)
Learning how to curl hair with a 3-in-1 tool for beginners starts with knowing what is in your hands. A 3-in-1 hair styler is a single styling tool with interchangeable or built-in attachments that dry, straighten, and curl hair.
There are two main designs:
- Air styler with barrel attachments. A dryer motor pushes air through the barrel while the surface heats. You wrap hair around the outside.
- Three-barrel waver or heated plate tool. Solid heated plates or barrels create crimped, beachy waves. No airflow involved.
The CHASKA Air Styler falls in the first group. Twin Turbo fans sit inside the plates and push air directly onto the section as you wrap.

What You'll Need Before You Start Curling Hair
Gather everything first so you are not hunting for a clip mid-curl. Here is the short list:
- Your 3-in-1 hair styler with the curling attachment locked in
- A heat protectant, such as the CHASKA Moisture Rich Heat Protectant
- Two to four sectioning clips
Skip the heavy oils and wet gels. They sizzle under heat and weigh curls down.

One more thing: plug in and let the tool heat fully before you touch your hair. Most stylers need a minute or two. A cold barrel grabs and creases hair instead of gliding.
How to Use a 3-in-1 Hair Styler: 7 Steps for Beginners
Here is the full beginner workflow, start to finish. Total time runs about 15 to 25 minutes your first try.
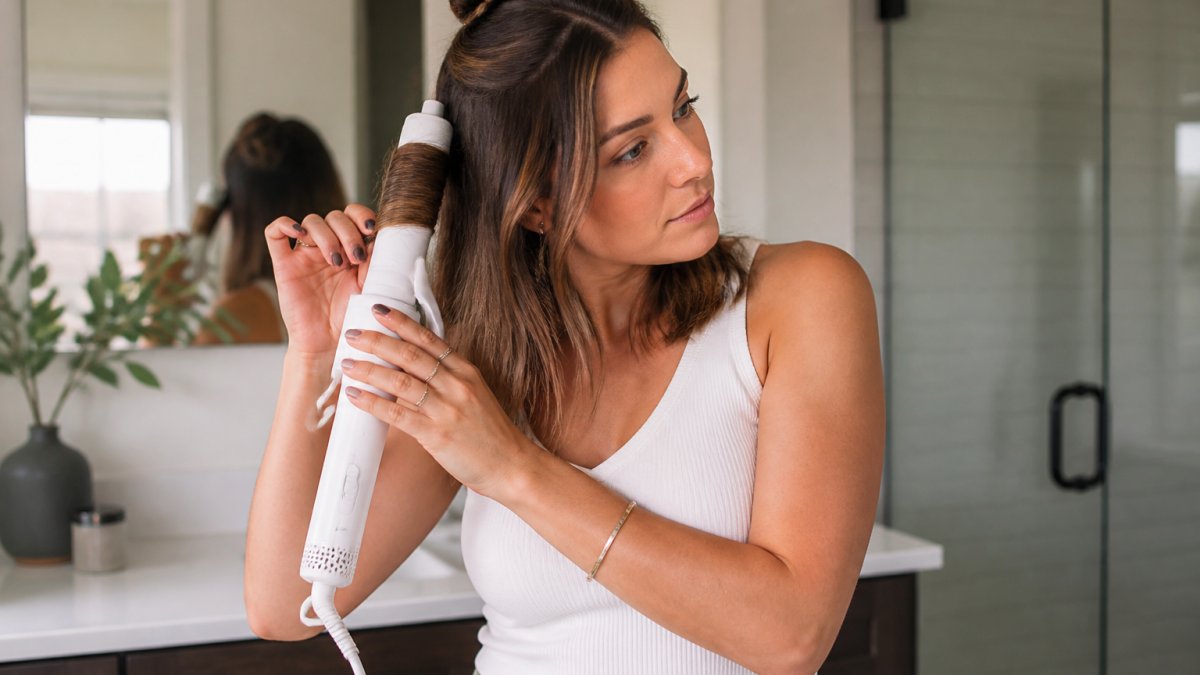
Step 1: Start With Dry, Detangled Hair
Brush through every knot before you pick up the tool. Run a wide-toothed comb from ends to roots. Tangles left in place turn into snags and hot spots. If your styler has airflow, hair can be about 80 percent dry.
Step 2: Apply Heat Protectant and Section Your Hair
Warm two to three drops of heat protectant between your palms for shorter hair, or up to a coin-sized amount for longer lengths. Work it from ends upward, avoiding the roots.
Then clip hair into four sections: two at the front, two at the back. Smaller sections give you more control and a more even curl pattern.
Step 3: Set Your Temperature, Wrap, and Hold
Set your heat setting (see the guide below), then take a section about 1 to 2 inches wide. Open the clamp, place the section near the mid-lengths, and wrap the ends around the barrel. Hold for 5 to 10 seconds, then release and let the curl cool in your hand before dropping it.
Step 4: Work Section by Section, and Match the Wrap to Your Hair Length
How you wrap depends on how long your hair is, and this is where most text tutorials go silent.
- Short hair (above the chin): Use a 1-inch section and wrap only once around the barrel. Start the wrap close to the roots so the curl has somewhere to sit. Skip the clamp-and-slide motion, it pulls short hair straight.
- Medium hair (chin to collarbone): Use a 1- to 1.5-inch section. Wrap from mid-length down, leaving the last half-inch of ends free so they stay smooth instead of kinking.
- Long hair (below the collarbone): Use a 1-inch section and wrap in a spiral, feeding the hair around the barrel as you go rather than twisting it all at once. Twisting causes the ends to tangle around themselves and crease.
For texture: fine hair responds best to smaller sections and shorter holds; coarse or curly hair needs a slightly wider section and a full 10-second hold to smooth the cuticle before the curl sets.
Step 5: Alternate the Wrap Direction for a Natural Fall
A common beginner mistake is wrapping every section the same way, which produces a uniform, helmet-like result. Alternate directions:
- On the left side of your head, wrap away from your face (barrel pointing down, hair fed over the top).
- On the right side, wrap toward your face on the front pieces and away on the back pieces.
- On the crown, wrap away from the part so the roots lift instead of lying flat.
If you want a beachy, undone look, alternate direction on every other section. If you want a polished, uniform look, keep the direction consistent on each side but mirrored left-to-right.
Step 6: Let Each Curl Cool Completely Before You Touch It
This is the step beginners skip. A warm curl is still moldable, if you touch it, brush it, or drop it too soon, it stretches out and falls within the hour. Release the curl and let it sit in your palm or against your head for a full 10 to 15 seconds before moving on.
Step 7: Finger-Comb and Loosen at the Roots
Once every section is cool, run your fingers, not a brush, through the curls from roots to ends. A brush breaks the curl pattern; fingers separate it into waves. To add volume, gently lift the roots with your fingertips and shake. For a tighter finish, leave the curls as they are. For looser waves, run your fingers through twice.
Temperature Guide: What Heat Setting to Use by Hair Type
Match your heat setting to your hair type, not to the highest number on the dial. Fine or damaged hair needs the lowest setting. Thick, coarse hair needs more.
| Hair Type | Suggested Heat Setting | Hold Time | Notes |
|---|---|---|---|
| Fine or thin | Low | 5 seconds | Lower heat, shorter hold |
| Color-treated or dry | Low to medium | 5-7 seconds | Use heat protectant every time |
| Medium, healthy | Medium | 7-8 seconds | The most forgiving range |
| Thick or coarse | Medium to high | 8-10 seconds | Section smaller for even heat |
| Curly, hard to smooth | High | 10 seconds | Dry fully first, then wrap |
Start one level lower than you think you need. You can always add heat, but you cannot undo a burn.
3-in-1 Hair Styler Attachments: How to Switch and Care for Them
Changing attachments is where most beginners lose time. The rule is simple: switch while the tool is cool or barely warm, never right after a hot pass.
To swap an attachment:
- Unplug the styler or power it down.
- Let the barrel cool for a few minutes.
- Press the release button and pull the attachment straight off.
- Line up the new attachment and push until it clicks.
- Wipe the barrel with a soft, dry cloth before storage.
Clean the barrel weekly to stop product buildup. Buildup drags on hair and creates uneven heat. Store attachments in a pouch so the connections do not get bumped or bent.
One tool with three jobs only saves time if the attachments are easy to swap. Keep them within reach and switch while the barrel is cool.
CHASKA Air Styler - 3-in-1 Hair Dryer Straightener & Curler with Plasma →
How to Make Curls Last Longer (and Fix the Ones That Fall)
Long-lasting curls come down to three habits: cool setting, light product, and hands off. If your curls drop within an hour, one of those three is off.
Try these fixes:
- Let curls cool fully before you touch them. Warm curls stretch and fall.
- Use less product. Heavy creams and oils pull curl out. A light heat protectant is enough.
- Mist with a light hold spray after styling, not before.
If a whole section falls flat, re-wrap just that piece for 5 seconds rather than redoing your whole head.
Beginner Mistakes That Cause Burns, Frizz, and Droopy Curls
Most beginner problems trace back to one of five root causes. Here is how to diagnose each one and fix it on the spot.
Problem: Curls fall flat within an hour
Root cause: The curl was not allowed to cool before it was touched, or too much product weighed it down.
Fix: Release each curl into your palm and hold it for a full 10 to 15 seconds before dropping it. If your hair is stubborn, pin the curl against your head with a sectioning clip while it cools, then release at the end.
Problem: Curls look uneven or lopsided
Root cause: Sections are different sizes, or the wrap direction changes randomly.
Fix: Use the same section width on every piece, 1 inch for fine hair, 1.5 inches for thick hair. Decide your wrap direction before you start (see Step 5) and stick to it. If one side looks tighter than the other, it is almost always because you wrapped it in the opposite direction.
Problem: Sharp creases or dents in the curl
Root cause: The clamp was closed on the hair for too long at one spot, or the ends were wrapped over themselves.
Fix: Keep the clamp moving, do not park it in one place. Leave the last half-inch of ends free of the barrel so they do not kink. If a crease already formed, re-wet that section slightly with a spray bottle, let it dry, and re-wrap with a shorter hold.
Problem: Hair catches, snags, or pulls in the tool
Root cause: The section is too wide for the barrel, the hair is tangled, or the barrel is not hot enough to glide.
Fix: Stop immediately, do not pull. Open the clamp and unwind the hair in the reverse direction you wrapped it. Then re-section smaller and comb through again. A cold barrel grabs hair; let the tool heat fully before you start.
Problem: Frizz instead of smooth curls
Root cause: Styling hair that is still wet under a hot plate, or skipping heat protectant.
Fix: Wet hair under a hot plate boils and frizzes. Dry it fully first, or use a tool with airflow that dries as it curls. Always apply heat protectant before the tool touches your hair, no coating means direct heat damage and a roughed-up cuticle.
Problem: Burns on fingers, ears, or neck
Root cause: Fingers placed near the hot plate, or the barrel brought too close to the scalp.
Fix: Keep fingers behind the clamp, never near the plate. Hold the tool at a slight angle away from your head so the barrel never touches skin. Rest the tool on a heat-resistant mat between sections, setting a hot barrel on a counter or towel is a burn risk and can scorch surfaces.
If a whole section falls flat, re-wrap just that piece for 5 seconds rather than redoing your whole head. Re-styling one section is faster and causes less cumulative heat damage than a full redo.
Conclusion: Your First Curl Session, Start to Finish
Your first try will not look like a salon blowout, and that is fine. Dry, detangle, protect, section, wrap, hold, cool. Repeat until the whole head is done. The technique gets faster every time.
If you want one tool that handles drying, straightening, and curling without a drawer full of gadgets, the CHASKA Air Styler does all three. Pair it with the CHASKA Moisture Rich Heat Protectant for smoother, longer-lasting curls.
Frequently Asked Questions
What is a 3-in-1 hair curler and how is it different from a regular curling iron?
A 3-in-1 tool combines a dryer, straightener, and curler in one device, so you can dry, smooth, and curl without switching tools. The CHASKA Air Styler, for example, uses twin turbo fans built into the plates to push air through your hair as you style, which cuts drying time compared with a standard curling iron that only applies surface heat. For beginners, that means fewer tools to learn and less juggling between steps.
Should your hair be wet or dry when using a 3-in-1 hair styler?
It depends on the tool. Air stylers with built-in airflow, like the CHASKA Air Styler, can be used on damp hair because the fans help dry as they shape. Traditional hot barrels need completely dry hair, since trapping moisture against a hot plate causes steam damage and frizz. If you are unsure, check your manual. When in doubt, rough-dry to about 80 percent and finish with the tool.
How do you curl hair with a 3-in-1 tool without burning yourself?
Keep the barrel away from your scalp, ears, and neck, and wrap only the mid-lengths and ends. Hold sections no wider than 1 to 2 inches so hair does not slip and force your fingers near the hot plate. Let each section cool completely before touching it, and always set the tool down on a heat-safe surface. Beginners should start on the lowest heat setting that still shapes their hair type.
How long should you hold each section of hair around the barrel?
Most 3-in-1 tools need 5 to 10 seconds per section, depending on your hair texture and heat setting. Fine hair often sets in under 10 seconds, while thick or coarse hair may need closer to 10. If the curl falls out within minutes, your hold time or temperature was too low. If the hair feels hot to the touch or smells singed, reduce the heat and shorten the hold.