


How to Get Bouncy Voluminous Hair With One Tool
Table of Contents
- Why One Tool Can Deliver Bouncy, Voluminous Hair
- 3-in-1 Hair Curler Tutorial: Step-by-Step for Beginners
- The Best Tool for Curling Hair for Beginners
- How to Add Volume at the Roots
- How to Make Curls Last Longer
- Safety and Troubleshooting for Beginners
- Conclusion
- Frequently Asked Questions
Last Updated: October 7, 2026
Why One Tool Can Deliver Bouncy, Voluminous Hair
You do not need a drawer full of hot tools to get bouncy voluminous hair. One multi-function styler, used correctly, can dry, smooth, and curl in a single pass, which is why we built our routine around the CHASKA Air Styler here at The Chaska Life.

The catch is technique, not equipment. Most people rush the wrap, skip the heat protectant, or hold the barrel at the wrong angle. Fix those three things and the volume shows up on its own.
Below, we break down a full beginner workflow: how to prep, section, wrap, and set each piece of hair so the curl holds past lunch. We also cover root volume, safety, and the mistakes that flatten a style before you leave the house.
3-in-1 Hair Curler Tutorial: Step-by-Step for Beginners
This tutorial walks through the whole process in three stages: prep, protect, and style. Budget about 15 to 20 minutes for shoulder-length hair once the motions feel familiar, and closer to 25 minutes the first time.
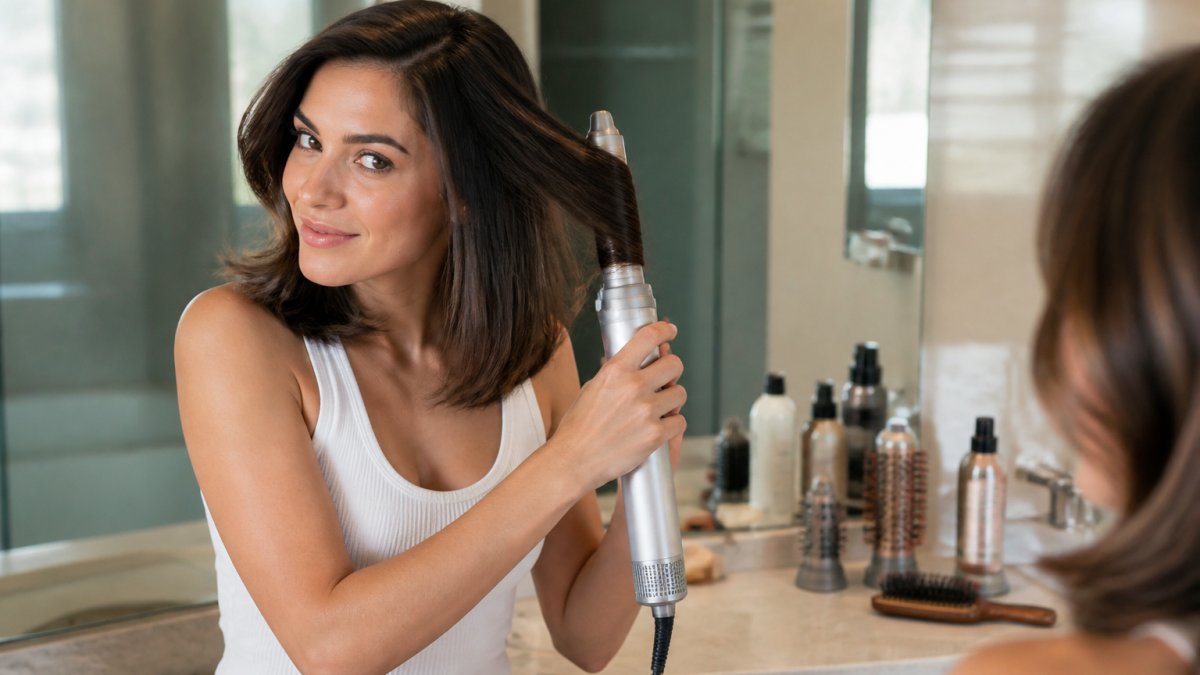
Before you start, confirm which tool you are holding, because the technique changes with the design:
- Interchangeable-barrel styler (3-in-1 air styler): one handle, snap-on attachments for drying, smoothing, and curling. You curl by wrapping hair around the round brush or barrel attachment while air flows through it.
- Standard curling iron: a single fixed barrel with a clamp. You curl by clamping the ends and rolling up, or by wrapping hair around the outside of the barrel.
- Flat iron: two heated plates. You curl by clamping a section and pulling the iron through it with a half-turn, which produces a ribbon curl rather than a spiral.
- Three-barrel waver: three fixed barrels in a row. You press a section between them to create an S-wave, not a curl, and you cannot wrap individual pieces around it.
If you are using a waver, skip the wrap steps below and follow the tool's own press-and-hold method instead. The rest of this tutorial assumes an interchangeable-barrel styler or a curling iron.
Step 1: Prep and Detangle Damp Hair
Start with hair that is 80 to 90 percent dry. Towel-dry first, then let it air-dry for a few minutes. Soaking wet hair will not hold a curl, and bone-dry hair is harder to shape.
Brush through with a wide-tooth comb or a detangling brush. Work from the ends up to the roots. Any knot left in place will turn into a crease once heat hits it.
- Squeeze excess water out with a microfiber towel
- Comb from ends to roots, never the reverse
- Leave hair slightly damp, not dripping
Step 2: Apply Heat Protectant and Section Hair
Apply a heat protectant before any heat touches your hair. Our Moisture Rich Heat Protectant uses two to three drops for shorter lengths and up to a coin-sized amount for longer hair. Rub it between your palms, then work from the ends upward, avoiding the roots.

Comb it through so the product spreads evenly. Now section the hair.
- Split hair into four parts: two front, two back
- Clip three sections out of the way
- Work with pieces about 1 to 2 inches wide
Small sections are the difference between loose curls and a frizzy mess. If a section feels too thick to wrap easily, it is too thick.
Step 3: Set Temperature, Wrap, and Hold Each Section
Temperature is where most beginners guess. A safe approach is to start on the lowest setting your tool offers and add heat only if the curl does not hold after it cools. Most stylers run roughly 250°F to 450°F, and the practical ranges below are a starting point, not a rule:
- Fine hair: 250°F to 300°F
- Medium hair: 300°F to 350°F
- Thick or coarse hair: 350°F to 400°F
- Color-treated or chemically relaxed hair: stay at or below 350°F
- Damaged, bleached, or fragile hair: 250°F to 300°F, and consider skipping the highest settings entirely
If your tool has a 3-in-1 attachment system, switch to the curling attachment before you set the temperature, not after. Attachments are easier to seat on a cool tool, and the barrel needs a moment to reach the set temperature once it is locked in.
Wrap each section around the barrel, keeping the tool angled downward. Hold for 5 to 10 seconds, then release. Let the curl cool in your hand before dropping it. That cooling step is what sets the shape.
- Hold time: 5 to 10 seconds per section on fine or medium hair
- Hold time: 8 to 12 seconds on thick or coarse hair
- Direction: wrap every front section away from your face for lift
Step 4: Work Around the Head and Finish
Repeat the wrap-and-hold on each section, working from the back of the head forward so the front pieces, the ones people see, are the last to be styled and the freshest.
Once every section is cool, shake your fingers through the curls at the roots to break up the cast. Do not rake your fingers all the way to the ends; that is what turns a curl into a wave. Finish with a light hold spray if you need it.
The Best Tool for Curling Hair for Beginners
The best tool for curling hair for beginners is a 3-in-1 air styler with a round barrel and adjustable heat. It combines drying and curling in one pass, so there is less to learn and less to juggle.
The CHASKA Air Styler fits this brief. Its twin turbo fans sit inside the plates and push air directly onto the hair, which speeds up drying while you style.
CHASKA Air Styler - 3-in-1 Hair Dryer Straightener & Curler with Plasma →
For anyone with zero styling skills, the appeal is simple: one tool, one motion, one result. No switching between a dryer and an iron mid-routine.
How to Add Volume at the Roots
Root volume comes from lifting hair away from the scalp while it is still warm, then letting it cool in that lifted position. Flat roots are a cooling problem, not a curling problem.
Here is how to add volume at the roots with the same tool:
- Lift the top section straight up before wrapping
- Hold the barrel close to the scalp for two to three seconds
- Release and pin the section up with a clip
- Leave clips in for five minutes, then remove
For extra lift, wrap the front sections away from your face. This pushes hair back and up instead of flat against the forehead. A little dry shampoo at the roots before styling also adds grip, which helps fine hair hold shape longer.
How to Make Curls Last Longer
Curls last longer when hair is fully dry, fully cool, and lightly set before you touch it. Rushing any of those three steps is the main reason a style falls flat by mid-morning.
A few habits that help:
- Start with clean, completely dry hair
- Use a heat protectant so hair keeps its natural moisture
- Wrap in consistent, even sections
- Let every curl cool before styling
- Finish with a light hold spray, not a heavy one
Sleep on a silk pillowcase or tie hair loosely on top of your head at night. Both reduce friction, which is what breaks a curl apart while you sleep.
Safety and Troubleshooting for Beginners
Most beginner problems come down to a handful of issues: flat curls, frizz, creases, uneven sections, hair catching in the tool, or heat damage. Each has a fix, and most of them are technique, not product.
| Problem | Likely Cause | Fix |
|---|---|---|
| Curls fall flat fast | Hair was damp or not cooled | Dry fully, cool each curl before touching it |
| Frizzy ends | No heat protectant, or too much heat | Apply protectant before styling; drop one heat setting |
| Creases or dents in the curl | Section was too thick or the wrap overlapped | Use 1-2 inch sections; wrap flat, not twisted |
| Uneven curl pattern | Inconsistent hold times or section sizes | Count the same hold time for every section |
| Hair catching or snagging | Tangled ends or a dirty barrel | Comb each section before wrapping; wipe the barrel |
| Scalp or ears too hot | Tool held too close to skin | Keep the barrel at least an inch off the scalp |
| Curl direction looks random | Wrapping some pieces forward, some back | Pick one direction per side and stay consistent |
Burn Prevention and Safe Handling
Heat tools cause contact burns, and the fix is mostly habit:
- Keep the barrel at least an inch away from your scalp, ears, neck, and forehead. The scalp is the most common burn site because people press the tool close for root lift.
- Never wrap hair around a hot barrel with your bare hand. Use the included glove if your tool ships with one, or hold the section with a comb.
- Set the tool on a heat-resistant mat or its own stand between sections. Fabric, towels, and countertops can scorch.
- Unplug the tool when you finish. Do not rely on an auto-off feature alone.
- Let the tool cool completely before you change attachments or store it.
Attachment Changes and Tool Care
If you are using a 3-in-1 styler, the attachment is the part most likely to cause problems:
- Switch attachments only when the tool is cool. Hot barrels are hard to grip and easy to drop.
- Seat the attachment fully until it clicks or locks. A partially seated barrel wobbles and gives uneven heat.
- Wipe the barrel and plates with a damp cloth after each use, once cool, to remove product buildup. Buildup is a common cause of snagging and uneven curl.
- Store the tool and its attachments in a dry place, with the cord loosely wrapped rather than kinked around the handle.
Conclusion
Getting volume and bounce with a single tool is a timing problem more than a skill problem. Dry the hair, protect it, section it small, and let every curl cool.
The CHASKA Air Styler handles the drying and curling in one pass with its twin turbo fans and plasma ion system, and our Moisture Rich Heat Protectant preps hair before the heat goes on. Together they cut a multi-tool routine down to one step.
Get started with The Chaska Life and build a routine that fits the time you actually have.
Frequently Asked Questions
What is a 3-in-1 hair curler?
A 3-in-1 hair curler is a single styling tool that dries, straightens, and curls hair using interchangeable or built-in attachments. Instead of switching between a blow dryer, flat iron, and curling wand, you use one device with adjustable heat settings. The CHASKA Air Styler ($249.00) is an example, using twin turbo fans and plasma technology to dry and style at the same time, which cuts total styling time for busy mornings.
What is the best way to curl your hair for beginners?
Start with dry, detangled hair, apply a heat protectant like CHASKA Moisture Rich Heat Protectant ($24.00), and work in small sections no wider than 2 inches. Set your tool to 300-350°F, wrap each section around the barrel away from your face, and hold for 5-10 seconds. Release and let the curl cool before touching it. Cooling is what locks the shape, so resist the urge to finger-comb immediately.
How can you make curls look bouncy and voluminous?
Bounce comes from two things: root lift and loose, cooled curls. Wrap hair at the roots in the opposite direction of its natural fall, hold for a few seconds, then release. For the lengths, use larger sections and hold 5-10 seconds instead of the full 10. Once all sections are done, flip your head upside down and shake gently, then use your fingers to loosen curls rather than a brush, which flattens them.
Should you curl your hair when it is wet or dry?
It depends on the tool. Traditional curling irons and wands work on dry hair only, since wet hair can be damaged by direct high heat. Air stylers with built-in airflow, like the CHASKA Air Styler, can be used on damp hair because the airflow dries as it shapes. If you are using a standard curling iron, always start with hair that is 100% dry and prepped with heat protectant.