


Professional Results with One Tool: A 2026 Guide
Table of Contents
- Why One Tool Beats a Drawer Full of Stylers
- The Professional Results Framework: Technique Over Tools
- Step 1: Pre-Dry for Speed and Control
- Step 2: How to Use an Air Styler for Volume at the Root
- Step 3: Precision Straightening and Polished Ends
- Step 4: Creating Curls That Last
- Common Mistakes That Sabotage Your Results
- Why the CHASKA Air Styler Delivers Best 2026 All-in-One Stylers Performance
- Frequently Asked Questions
Last Updated: September 5, 2026
The idea that you need a separate flat iron, curling wand, and blow dryer to achieve professional results is outdated. In fact, the most significant shift in modern hairstyling is the rise of the all-in-one air styler, a single device engineered to dry, straighten, and curl hair with impressive precision. This guide from The Chaska Life breaks down the exact techniques that separate salon-quality outcomes from "good enough" home styling.
Getting professional results with one tool isn't about magic hardware; it's about mastering a repeatable system. Many women waste twenty minutes a day switching between hot tools, exposing their hair to repeated heat cycles (PubMed). The real secret to efficiency lies in understanding airflow, tension, and timing, not in owning more gadgets. Below, we'll show you exactly how to use an air styler to achieve volume, sleekness, and lasting curls, addressing the common mistakes that sabotage your finish.
Why One Tool Beats a Drawer Full of Stylers
Most styling routines fail because they rely on too many devices, each with its own heat settings and learning curve. An all-in-one hair styler eliminates the guesswork by consolidating the drying, straightening, and curling phases into a single, familiar motion. This isn't just about convenience; it's about consistency.
When you use one tool repeatedly, you calibrate your muscle memory. You learn precisely how the airflow behaves on wet hair versus dry hair, and you develop a feel for the tool's balance and heat distribution. This deliberate practice leads to faster styling sessions and more predictable outcomes, which is the foundation of technical execution.
The Professional Results Framework: Technique Over Tools
Professional results are the product of a repeatable system, not a specific brand. Whether you are working with a $50 dryer or a premium styler, the principles of tension, sectioning, and heat control remain constant. The framework has three pillars: preparation, controlled motion, and finishing.
- Preparation: Hair must be detangled and roughly dried to about 80% before precision work begins.
- Controlled Motion: Gliding the tool slowly enough to smooth the cuticle, but fast enough to prevent heat damage.
- Finishing: Using a cool shot or low-heat pass to set the style and lock in the shape.
Mastery here means you can walk into any bathroom, pick up any tool, and still produce a client-ready look because your skill isn't dependent on the device.
Step 1: Pre-Dry for Speed and Control
Before you chase volume or polish, you need to remove excess moisture. Using the air styler on sopping wet hair is a common mistake that leads to frizz and wasted time, as the tool struggles to evaporate water rather than style the strand.

Start by towel-drying your hair until it is damp, not dripping (the American Academy of Dermatology). Then, use the styler on a medium heat and high airflow setting, pointing the nozzle downward to smooth the cuticle. Focus on the roots and the thickest sections at the back of the head first. This initial pass should reduce moisture content by roughly 70%, leaving the hair pliable but not wet. This step builds the foundation for every technique that follows.
Step 2: How to Use an Air Styler for Volume at the Root
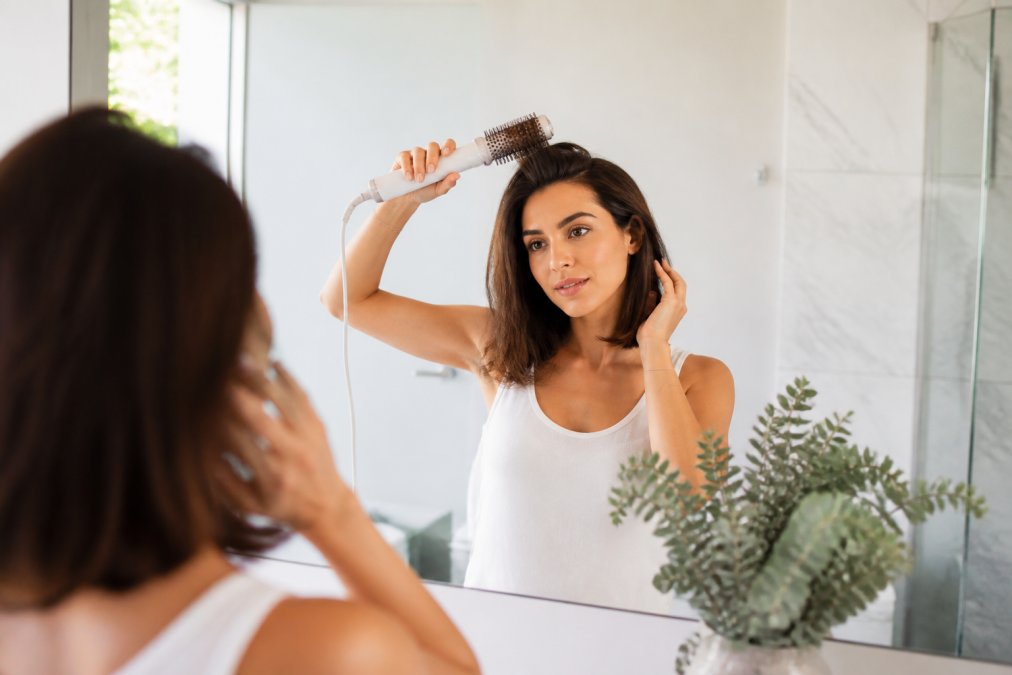
Getting volume at the root requires lifting the hair away from the scalp while applying heat, a technique that many home users skip in favor of just drying the lengths. To create lift, take a one-inch horizontal section at the crown and hold the styler underneath it, close to the roots.
Angle the nozzle upward and use your fingers or a comb to push the root upward against the direction of growth while the airflow dries it. Hold for five to ten seconds until the root feels warm and dry. Release the section and move to the next, working from the front hairline to the back. This method builds lasting structure because you are setting the hair's memory while it is still damp enough to mold.
Step 3: Precision Straightening and Polished Ends
Once the roots have lift, the midsections and ends require a different motion: downward tension. The goal here is to stretch the hair shaft and seal the cuticle for a glossy, sleek finish. Divide your hair into quadrants, clipping away the top sections to work on the bottom layers first.
Take a small section, about one inch wide, and clamp the styler near the root. Glide it down the length slowly, keeping slight tension on the ends with your free hand. For the ends, roll the styler slightly under as you reach the bottom to create a gentle inward curve. This prevents the "flipped out" look that often ruins a polished style. Consistency in section size is the key to avoiding missed spots or uneven texture.
Step 4: Creating Curls That Last
Curls created with an air styler rely on the same principle as a curling iron, but they require the hair to be completely dry to hold their shape. If you attempt to curl damp hair, the style will fall flat within minutes as the moisture evaporates (peer-reviewed research).
Wrap a one-inch section around the barrel, leaving the ends out, and hold for eight to twelve seconds. Before releasing, switch the styler to a cool shot setting if available, or hold the curl in your palm for a few seconds to let it set. This cooling phase is critical for memory. Once you finish all sections, resist the urge to brush the curls out immediately. Let them cool completely, then gently shake them loose with your fingers for soft, voluminous waves.
Common Mistakes That Sabotage Your Results
Even with a high-performance tool, subtle errors in your workflow will undermine the finish. The difference between a salon-quality outcome and a frustrating one often comes down to a few correctable habits. Here are the most frequent failure points, along with the mechanical reason they occur and the precise fix.
Mistake 1: Overloading the Section
The error: Taking a section wider than the tool's barrel or plate surface.
Why it fails: Heat and airflow have a limited penetration radius. When a section is too thick, the outer strands are styled, but the inner core remains damp or under-processed. When that moisture eventually evaporates, it disrupts the style, causing frizz or a loss of curl memory within minutes.
The fix: A strict one-inch section is a reliable standard for most tools. If you have very dense or coarse hair, reduce to half-inch sections. You should be able to see the tool's plates or barrel edges clearly on either side of the strand. This ensures even heat distribution and predictable tension.
Mistake 2: Confusing Airflow Speed with Styling Speed
The error: Moving the tool down the hair shaft as quickly as you would when just drying.
Why it fails: Drying is a bulk process; styling is a precision process. When you move too fast, the heat doesn't have enough dwell time to reshape the hydrogen bonds in the hair. You are merely evaporating surface water, not setting a new shape. The result is hair that feels dry but lacks structure, falling flat or looking 'fluffy' rather than sleek.
The fix: Slow your glide speed by roughly 50% compared to your drying pass. You are looking for a controlled, steady motion that takes about 5-7 seconds per one-inch section. You should feel the tool 'grab' the hair slightly, indicating you are applying enough tension to smooth the cuticle.
Mistake 3: Skipping the Thermal Lock-In Phase
The error: Releasing a curl or a volume lift immediately after the heat is removed, or brushing it out while it is still warm.
Why it fails: Hair is thermoplastic. Heat makes it pliable; cooling makes it rigid. If you release tension while the strand is still warm, the style will relax as it cools on its own, losing up to 50% of its initial lift or curl. The style is not 'set' until it has returned to room temperature.
The fix: After shaping a curl, hold it in your closed palm for 10-15 seconds to allow it to cool in that molded position. For root volume, let the section cool completely before combing it flat. If your tool has a cool-shot button, use it for 3-5 seconds before releasing the strand. This is the single most effective way to extend style longevity.
Mistake 4: Ignoring the Nozzle Angle
The error: Pointing the airflow at the hair shaft from a perpendicular angle.
Why it fails: Perpendicular airflow creates turbulence, which roughs up the cuticle and causes frizz. It also scatters the heat, making the drying process less efficient.
The fix: Always direct the airflow down the hair shaft, from root to tip. This 'smoothing' angle presses the cuticle flat, which reflects light better and creates shine. When drying the roots for volume, angle the nozzle slightly upward, but keep the airflow directed along the strand, not into it.
Why the CHASKA Air Styler Delivers Best 2026 All-in-One Stylers Performance
The CHASKA Air Styler is engineered to address the core challenges of home styling, making it a solution for busy individuals. Its patented heat plate design combines a dryer, straightener, and curler into one device, simplifying your beauty routine without sacrificing output quality. The inclusion of Twin Turbo fans placed directly in the plates doubles the drying power, cutting down the time you spend on the pre-dry phase significantly.
This all-in-one hair styler is suitable for all hair types, from fine and straight to thick and curly, offering the aesthetic control you need for a professional finish. At $249.00, it replaces the need to purchase separate tools, offering clear benefits in both cost and counter space. For those skeptical about all-in-one tools, the CHASKA Air Styler stands out because it does not compromise on the fundamental mechanics of airflow and heat, delivering the consistency that stylists demand.
The Psychology of Mastery: Why Your Mindset Matters More Than the Motor
Most discussions about professional tools focus on specifications, wattage, temperature range, and plate material. But the single greatest differentiator between a professional and an amateur is not the hardware; it is the mental model they use while working. This is the 'psychology of tool mastery,' a concept rarely discussed in product reviews but essential for consistent output.
Patience as a Technical Skill. A professional does not rush a section. They understand that a 10-second pass at the correct temperature yields a better result than a 4-second pass at a higher temperature. This patience is not about being slow; it is about respecting the physical process of heat transfer. When you rush, you compensate with higher heat, which increases the risk of damage. When you are patient, you let the tool work at its optimal efficiency.
Iteration Over Perfection. Professionals do not expect a single pass to be perfect. They build the style in layers, checking the result after each section and correcting as they go. This iterative loop, act, observe, adjust, is the core of deliberate practice. Amateurs often expect a flawless result on the first attempt and become frustrated when it does not happen. Reframe your approach: each styling session is a series of small experiments, not a final exam.
The 'Feel' for Feedback. A professional develops tactile sensitivity to what the hair is telling them. They feel when a section is fully dry by its texture, not just by a timer. They notice a slight resistance that indicates the cuticle is smoothing. This feedback loop is developed through repetition. When you use the same tool consistently, you calibrate your senses to its specific behavior. This is why the CHASKA Air Styler's consistent heat distribution and predictable airflow are critical, they allow you to build this muscle memory faster, because the tool's behavior is reliable.
A Universal 5-Step Framework for Any Tool
The principles of professional execution are not unique to hair styling. Whether you are using a chef's knife, a paintbrush, or a software suite, the path to mastery follows the same arc. This framework is tool-agnostic and applies to any device you want to master:
- Preparation: Clean your tool, understand its settings, and prepare your material (hair, canvas, ingredients) to the correct starting state.
- Calibration: Perform a small test pass to understand how the tool responds to your specific material and environment.
- Controlled Execution: Work in small, deliberate sections, maintaining consistent tension and speed. Do not rush.
- Verification: Pause and inspect your work. Look for evenness, texture, and shape. Identify any errors immediately.
- Lock-In: Finish with a step that 'sets' the work, a cool shot for hair, a sealant for paint, a rest period for meat.
By adopting this framework, you shift your focus from the tool itself to the system of execution. This is what separates a person who owns a professional tool from a person who gets professional results.
Frequently Asked Questions
Can one hair tool really replace a blow dryer, straightener, and curler?
Yes. Modern all-in-one stylers like the CHASKA Air Styler use twin turbo fans and heated plates to dry, straighten, and curl. The engineering has caught up to single-purpose tools. The key is choosing one with sufficient airflow and heat control. For most hair types, one tool handles what used to require three separate devices, which cuts styling time and reduces clutter.
What features should I look for in an all-in-one hair styler?
Look for adjustable heat settings, powerful airflow, and plates that work for both straightening and curling. The CHASKA Air Styler includes patented heat plates and twin turbo fans for faster drying. Plasma technology helps reduce frizz. A swivel cord and lightweight design matter for maneuverability. Consider how the tool fits your hand and whether the controls are easy to reach mid-style.
Is it better to use one versatile tool or multiple specialized hair tools?
For most home users, one versatile tool wins. Multiple tools mean more heat exposure during transitions, longer styling time, and higher cost. An all-in-one styler lets you dry and style in one pass. The benefits include less heat damage from repeated sectioning and a simpler routine that fits a busy schedule. The trade-off is learning one tool's technique instead of switching between devices.
How do I get professional results with one tool if I have thick or curly hair?
Work in small sections no wider than one inch. Pre-dry your hair to about 80 percent dry before straightening. Use the highest heat setting that your hair tolerates, and move the styler slowly from root to tip. For curls, hold the tool vertically and wrap sections around the barrel. Consistent tension and even speed matter more than the tool itself.
Mastering the techniques of pre-drying, root lifting, and tension-based smoothing will transform your daily routine. The challenge is finding a tool that keeps up with your skill and fits your lifestyle. The Chaska Life simplifies this with the CHASKA Air Styler, a 3-in-1 solution that dries, straightens, and curls with professional ease, saving you time and protecting your hair from repeated heat exposure. Get started with the CHASKA Air Styler and achieve salon-quality hair at home, every day.