


Salon Blowout Results at Home: Step-by-Step Guide
Table of Contents
- What You'll Need Before You Start
- Preparing Your Hair for a Salon Blowout
- Step-by-Step Technique to Achieve Salon Blowout Results
- How to Avoid Heat Styling Damage
- Best Heat Protectant for Blowouts
- How to Make a Blowout Last Longer
- Common Mistakes to Avoid
- Conclusion
- Frequently Asked Questions
Last Updated: September 18, 2026
What You'll Need Before You Start
Achieving salon blowout results at home requires the right tools, products, and technique.
You'll need a high-powered blow dryer with adjustable heat and speed settings, a concentrator nozzle attachment to direct airflow, and a round brush with boar bristles or ionic technology for volume and control.
Heat protectant is essential, it shields hair from thermal damage. The Chaska Life's Moisture Rich Heat Protectant contains argan oil and vitamin E.

Thermal rollers help set volume and create longer-lasting curls. A cool shot button seals the cuticle at the end of each section.
Here's what to gather:
- Blow dryer with variable heat and speed
- Concentrator nozzle attachment
- Round brush (boar bristle or ionic)
- Heat protectant spray
- Thermal rollers (optional but helpful)
- Sectioning clips
- Wide-tooth comb
Preparing Your Hair for a Salon Blowout
Preparation determines everything that follows.
Start with clean, damp hair (water visible but not dripping). Excess moisture extends drying time and causes frizz.
Apply heat protectant to damp hair, working from ends upward and avoiding roots. Use 2-3 drops for short hair, up to a coin-sized amount for longer hair. Comb through with a wide-tooth comb to distribute evenly and protect the cuticle.
Match product and heat to your hair type: fine hair needs less product and lower heat; thick, curly hair needs more moisture protection; porous hair benefits from extra conditioning.
Detangle completely before blow-drying. Knots trap moisture and create frizz. A wide-tooth comb works better than a brush on damp hair because it's gentler.
Step-by-Step Technique to Achieve Salon Blowout Results
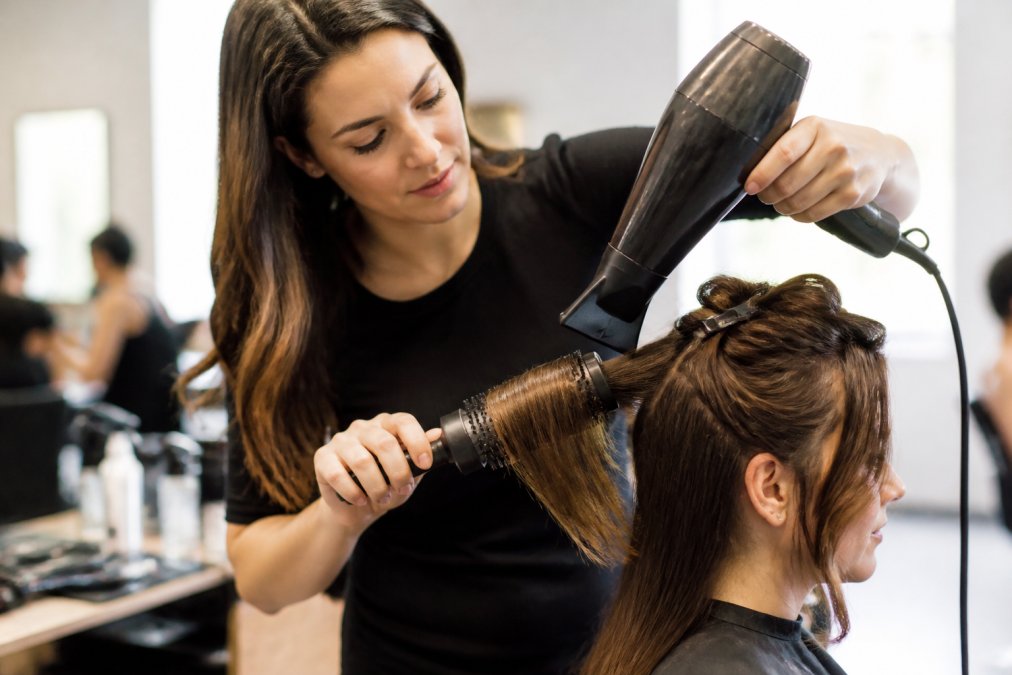
Start at the back of your head and work forward (it dries slower). Always use a concentrator nozzle to focus airflow.
Sectioning Your Hair for Control
Divide hair into 4-6 sections using clips. Part horizontally from ear to ear, clip the top half up, then section the bottom half into left and right sides. Each section should be thick enough to dry evenly but not so thick it stays damp in the middle. Work one section at a time, drying completely before moving to the next. Proper tension and consistent airflow become even more critical when managing thick hair to ensure that every layer receives the heat necessary for a smooth, professional finish.
Drying with Proper Airflow Direction
Always direct airflow downward along the hair shaft to seal the cuticle and create shine. Start at the roots, holding the round brush at the roots with the concentrator nozzle pointed downward. Keep the nozzle 3-4 inches away from the brush to avoid heat damage while maintaining drying power.
Using Round Brush Tension for Volume
Insert the round brush at the roots and roll away from your face with firm tension. Dry while rolled, keeping the nozzle pointed downward. Once mostly dry, slowly unroll while using the cool shot to set the shape. Angle the brush upward for root volume, downward for sleeker sides.
Applying the Cool Shot for Cuticle Sealing
After drying each section, immediately use the cool shot on medium or high speed for 10-15 seconds while hair is still in the round brush. This seals the cuticle, locks in shape, creates shine, and prevents frizz.
CHASKA Air Styler - 3-in-1 Hair Dryer →
How to Avoid Heat Styling Damage
Always use heat protectant before styling to create a barrier against thermal damage. Match heat settings to hair type: fine hair needs lower heat, thick hair can handle higher heat. Keep the dryer moving constantly, never hold it in one spot. Avoid blow-drying completely dry hair; stop at 80% dry. The Chaska Life Air Styler's direct airflow technology reduces styling time.

Best Heat Protectant for Blowouts
The right heat protectant depends on your hair's porosity and texture.
Understanding Hair Porosity and Product Selection
Low-porosity hair has a tightly sealed cuticle; choose lightweight silicone-based protectants without heavy oils. Medium-porosity hair benefits from balanced formulas combining silicones with lightweight oils like argan or jojoba. High-porosity hair needs heavier protection with humectants like glycerin or panthenol, or keratin-based protectants to fill cuticle gaps.
Key Ingredients and Their Functions
Silicones form a protective barrier that reflects heat and reduces water loss. Oils (argan for fine hair, coconut for coarse) add moisture and slow heat penetration. Proteins strengthen the shaft and fill cuticle gaps, especially for damaged hair. Humectants attract and bind moisture, essential for high-porosity hair but can cause frizz if overused.
Application Method Matters as Much as Product Choice
Apply heat protectant to damp hair (open cuticles absorb better). Use a coin-sized amount for shoulder-length hair, 7-10 ml for longer, 2-3 ml for shorter. Work from mid-length to ends, avoiding roots. Distribute evenly with a wide-tooth comb.
How to Make a Blowout Last Longer
A salon blowout lasts 3-5 days with proper care. Active maintenance extends the style through day three or four.
Night-One Care: Preserving the Initial Blowout
Use a silk or satin pillowcase (or wrap hair loosely in a silk scarf or bonnet) to minimize friction. Avoid sleeping with damp hair or heavy products before bed; use lightweight finishing spray if needed.
Day Two: Refreshing Without Rewashing
Dry shampoo refresh: Spray at roots, wait 30 seconds, brush through to lift flat roots. Targeted heat refresh: Use low heat on flat areas with a round brush, finish with cool shot. Texture spray: Spray mid-lengths and ends, scrunch to reactivate waves. Smoothing serum: Apply to frizzy areas to seal cuticle. Avoid washing; wear a shower cap if you must shower.
Day Three and Beyond: Extended Maintenance
Partial blow-dry: Blow-dry only flat sections (crown, roots, sides) with medium heat and cool shot. Braiding or pinning: Loosely braid or pin sections before bed to set waves. Dry shampoo layering: Apply in layers for extra volume. Finishing spray: Refresh style on day three. Most blowouts last 3-4 days with these techniques; wash by day 4-5.
Common Mistakes to Avoid
Common mistakes: skipping heat protectant, using cheap brushes, drying too quickly, forgetting the cool shot, using maximum heat on all hair types, blow-drying completely dry hair, poor sectioning, and holding the dryer too close (keep it 3-4 inches away).
Conclusion
Salon blowout results require technique, the right tools, and proper preparation. The process takes 20-30 minutes and results last 3-5 days with proper care. The Chaska Life Air Styler's 3-in-1 design and direct airflow technology reduce styling time. Combined with the Moisture Rich Heat Protectant and the sectioning and airflow techniques covered here, you'll achieve professional results consistently.
Frequently Asked Questions
How long does a salon blowout last?
A professional salon blowout typically lasts 3-5 days, depending on your hair type, humidity, and how well you maintain it. Fine or straight hair may hold the style longer, while curly or thick hair may need refreshing sooner. Using the right heat protectant and sleeping on a silk pillowcase extends longevity significantly.
Can I achieve salon blowout results without damaging my hair?
Yes, when you use proper technique and protection. Apply a heat protectant before styling to create a moisture barrier. Use appropriate heat settings for your hair type, avoid excessive passes over the same section, and finish with a cool shot to seal the cuticle. The CHASKA Moisture Rich Heat Protectant provides thermal protection while conditioning your strands.
What's the best heat protectant for blowouts?
Look for a heat protectant with ingredients like argan oil, vitamin E, and silicones that create a protective layer without weighing hair down. The CHASKA Moisture Rich Heat Protectant includes organic argan oil and tocopherols to shield hair from heat damage while enhancing smoothness and shine. Apply 2-3 drops to damp hair before blow-drying.
How do I make my blowout last longer?
Sleep on a silk or satin pillowcase to reduce friction and frizz. Avoid touching your hair excessively and use dry shampoo on roots to absorb oil buildup. Apply a lightweight finishing spray to lock in the style. Skip washing for 1-2 days if possible, and refresh curls or waves with a curling iron rather than re-blowing your entire head.