


How to Curl Hair with Air: Step-by-Step Guide
Table of Contents
- Air Styler Hair Prep: How to Set Up Your Hair for Success
- How to Curl Hair with Air: Heat Settings, Airflow, and Sectioning
- Step-by-Step: How to Curl Hair with Air Using the Coanda Effect
- Hair Type-Specific Adjustments for Air Styling
- How to Make Air Curls Last All Day
- Troubleshooting Air Wrap Curls: Fixing Frizz, Curl Drop, and Heat Damage
- Conclusion
Last Updated: August 17, 2026
Air Styler Hair Prep: How to Set Up Your Hair for Success
The single biggest reason air curls fail has nothing to do with technique, it comes down to hair prep. Air styling uses controlled airflow to wrap and form curls, so your hair's moisture level, texture, and product coating directly determine the result. Get those wrong, and no amount of technique will save it.
Ideal Moisture Level and Damp Hair Guidelines
The ideal moisture level for air styling is hair that is roughly 80-90% dry. Completely wet hair will not hold a curl and risks heat damage; bone-dry hair lacks the pliability needed for clean curl formation. After washing, towel-blot gently and rough-dry until the hair feels dry to the touch but still carries faint coolness at the roots. That residual moisture is your sweet spot. According to American Academy of Dermatology guidance on hair care, over-drying hair before styling increases cuticle damage, which directly affects curl hold. Fine hair dries faster and needs less time before styling; thick or coarse hair retains moisture longer and benefits from thorough drying.
Choosing the Right Pre-Styling Products
Not every product works well with air styling. The wrong choice can weigh hair down or create buildup that blocks the Coanda effect.
The CHASKA Moisture Rich Heat Protectant ($24.00) is specifically formulated to complement air styling. It protects against thermal damage while keeping the hair shaft smooth for clean airflow wrapping. Apply it to damp hair, section by section, before any heat touches the hair.

General guidelines for product selection:
- Heat protectant: Non-negotiable. Apply to every section before styling.
- Lightweight mousse or foam: Works well for fine hair, adds structure without weight.
- Texturizing spray: Best applied after styling to boost definition and hold.
- Avoid heavy creams or oils pre-styling: These coat the hair and interfere with airflow grip.
How to Curl Hair with Air: Heat Settings, Airflow, and Sectioning
The settings you choose are not one-size-fits-all. Getting them right is what separates a lasting curl from one that drops within the hour.
Selecting Heat and Airflow Settings by Hair Type
Fine or damaged hair: Use lower heat settings (around 300-330°F) with moderate airflow. Fine hair reaches its styling temperature quickly, and excess heat causes unnecessary stress.
Medium or normal hair: Mid-range heat (330-365°F) with moderate to high airflow handles most styling needs.
Thick, coarse, or resistant hair: Higher heat settings and strong airflow penetrate the hair shaft and create lasting curls.
Color-treated or chemically processed hair: Treat these like fine or damaged hair regardless of thickness. Processing weakens the cuticle, and high heat accelerates further damage.
According to guidance on thermal styling and hair health from the National Institutes of Health, repeated high-heat exposure causes cumulative protein loss in the hair shaft. Matching heat settings to your actual hair type is one of the most effective ways to protect long-term hair health.
Sectioning Hair for Consistent Curl Definition
Sectioning separates professional-looking results from uneven, patchy curls. Every section must receive the same amount of heat and airflow exposure.
A standard sectioning approach:
- Divide hair horizontally into two layers: lower section from nape to mid-ear, upper section from mid-ear to crown.
- Clip the upper section away and work through the lower layer first.
- Within each layer, take vertical sections no wider than 1-1.5 inches.
- For thicker hair, work with sections closer to 1 inch to ensure clean airflow wrapping.
Smaller sections produce tighter, more defined curls. Wider sections create looser waves. Decide on your target result and keep sections consistent throughout.
Step-by-Step: How to Curl Hair with Air Using the Coanda Effect
The Coanda effect is the aerodynamic principle that makes air styling possible. A moving airstream naturally follows and clings to a curved surface. In an air styler, the barrel attachment creates that curved surface, and the airflow draws hair toward it and wraps it around automatically.

Here is the complete step-by-step process:
- Prep your hair to 80-90% dry with heat protectant applied section by section.
- Select your heat and airflow settings based on your hair type.
- Section the hair into small, manageable 1-1.5 inch segments.
- Position the barrel attachment near the root of the section, with the airflow vent facing the hair.
- Hold the section taut with your free hand, pointing downward at a slight angle.
- Allow the Coanda effect to draw the hair onto the barrel. Do not force it manually; let the airflow do the work.
- Hold for 8-12 seconds depending on your hair type. Thicker hair needs slightly longer.
- Slide the tool downward along the section while maintaining the wrap.
- Release the curl gently and catch it in your palm to preserve its shape as it cools.
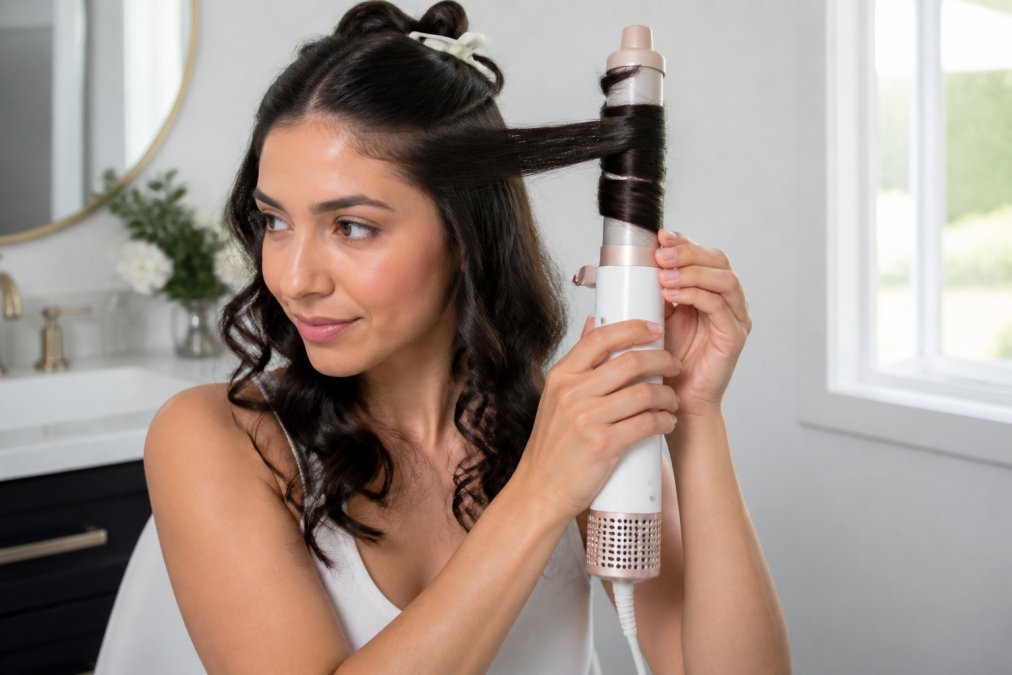
Wrapping Technique and Curl Direction
Wrapping all sections away from the face creates a classic, open curl pattern. Alternating the direction, one section toward the face, the next away, produces a more natural, textured wave pattern. Decide on your direction before you start and stay consistent within each layer.
Using the Cool Shot Button to Lock In the Curl
The cool shot button is not optional, it is the step that actually sets the curl. Heat opens the hair cuticle and makes the strand pliable enough to form a new shape. The cool shot closes the cuticle around that shape. After holding each section on the barrel, press the cool shot button for 5-8 seconds while the hair is still wrapped or just released. This single step has more impact on curl longevity than any finishing product.
Hair Type-Specific Adjustments for Air Styling
Air styling works across hair types, but the way you apply it needs to shift based on your hair's specific characteristics.
Fine hair: Use the smallest section sizes and shortest hold times. Fine hair wraps quickly and can over-process if left on the barrel too long. Start the barrel closer to the scalp for root lift.
Thick or dense hair: Work in smaller sections than you think you need. The biggest mistake is taking sections too wide, which means inner strands never fully contact the airflow. Increase hold time to 12-15 seconds and use the highest appropriate heat setting.
Curly or coily hair: Air styling redefines natural curl patterns without frizz. Apply a curl-defining cream or mousse before styling, and use moderate heat to enhance rather than override your natural texture.
Color-treated hair: Prioritize heat protection above everything else. Use the CHASKA Moisture Rich Heat Protectant on every section without exception. Lower heat settings and shorter hold times reduce cumulative thermal stress.
Hair density adjustments: High-density hair benefits from slightly stronger airflow to penetrate through the section. Low-density hair wraps easily but can tangle if airflow is too strong.
How to Make Air Curls Last All Day
Curl longevity comes down to three factors: how well the curl was set during styling, what products are applied after, and how the hair is handled throughout the day.
Setting the curl properly: The cool shot step is the foundation. Allow each curl to cool completely before touching it; running your fingers through curls immediately after styling breaks the structure before it has fully set.
Post-styling products for hold:
- Light-hold hairspray: Apply from 12 inches away for all-over hold without crunch.
- Texturizing spray: Adds grip and separation. Apply to fingertips and scrunch gently into the ends.
- Curl-defining serum: A small amount worked through the palms and pressed into curls adds shine and reduces frizz without weight.
Avoid applying any product directly to the roots post-styling, as this adds weight that pulls the curl down and collapses volume.
Handling throughout the day:
- Sleep with curls loosely pinned or in a silk-lined scrunchie to prevent friction damage.
- Refresh second-day curls with a light mist of water and texturizing spray, then scrunch gently.
- Avoid touching curls unnecessarily. Oils from your hands break down the curl structure over time.
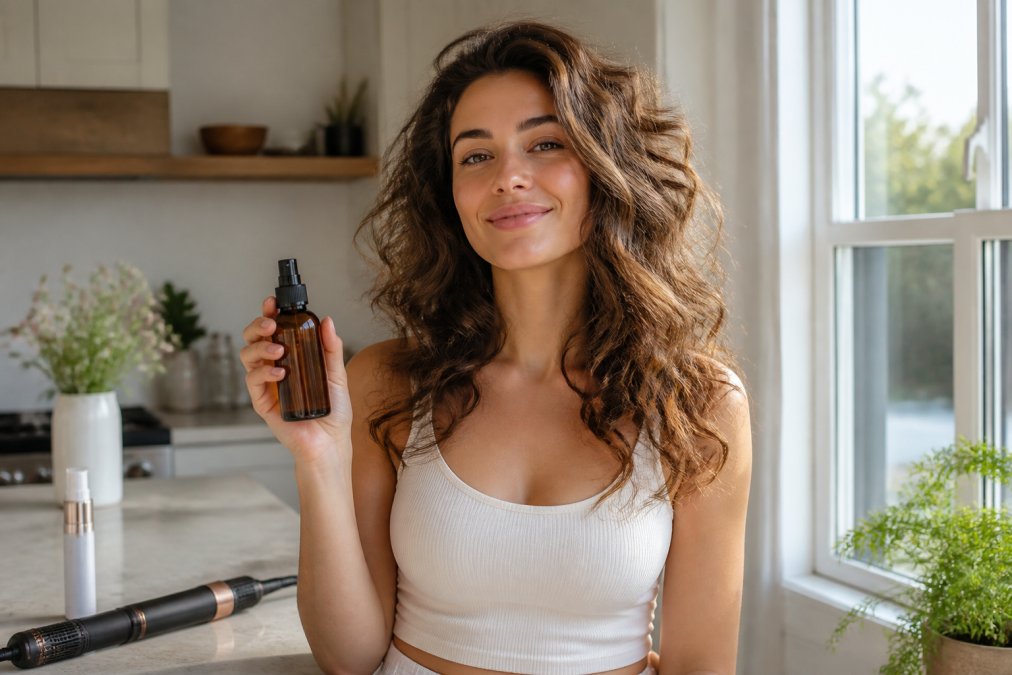
As noted by hair care research from the International Journal of Cosmetic Science, the cuticle's ability to retain its set shape is directly related to how quickly it is cooled after thermal styling. Products that seal the cuticle post-styling extend that effect throughout the day.
Troubleshooting Air Wrap Curls: Fixing Frizz, Curl Drop, and Heat Damage
The most common air styling problems are predictable and fixable.
| Problem | Most Likely Cause | Fix |
|---|---|---|
| Curl drop within 2 hours | Skipped cool shot or hair too wet | Use cool shot on every section; ensure hair is 80-90% dry before starting |
| Frizz throughout the curl | Cuticle not sealed, humidity, or rough towel drying | Apply heat protectant to every section; finish with a light serum |
| Uneven curls | Inconsistent section sizes | Work in uniform 1-1.5 inch sections throughout |
| Curl won't form | Hair too dry, wrong airflow angle, or section too wide | Add light moisture mist; reduce section size; reposition barrel closer to roots |
| Flat roots | Starting too far from the scalp | Begin the barrel at the root and allow the airflow to lift from the base |
| Heat damage over time | Heat settings too high for hair type | Reduce heat by one setting; always use heat protectant |
Troubleshooting curl drop: Curl drop is almost always caused by one of three things: the cool shot was skipped, the hair was still too damp when styling began, or the section size was too large for the heat setting to fully penetrate. Address all three and curl drop becomes rare.
Heat damage mitigation: The all-in-one design of the CHASKA Air Styler ($169.00) means you are using one consistent heat source rather than layering heat from a blow dryer and a separate curling tool. Combined with consistent heat protectant use, it is a more hair-healthy approach to thermal styling.
Frizz control: Frizz in air-styled hair is almost always a cuticle sealing issue. The cool shot closes the cuticle; a finishing serum locks it. If frizz persists despite both steps, the culprit is usually humidity. A light anti-humidity spray applied as the final step creates a barrier against moisture absorption.
Learning to curl hair with air takes a few practice sessions, but the technique becomes intuitive quickly once you understand the mechanics. Inconsistent results usually trace back to prep, section size, or skipping the cool shot, fix those three and the rest follows.
Achieving consistent, salon-quality curls at home is genuinely possible without juggling multiple tools. The CHASKA Air Styler ($169.00) is engineered to dry, straighten, and curl all hair types with professional precision, eliminating the need for a separate blow dryer and curling wand. Pair it with the CHASKA Moisture Rich Heat Protectant ($24.00) for a complete styling routine that protects hair health at every step. Get started with The Chaska Life and take the guesswork out of your daily styling routine.
Frequently Asked Questions
Do you use an air styler on wet or dry hair?
Start with hair that is about 80% dry, damp but not dripping. Fully wet hair takes too long to style and can cause frizz, while bone-dry hair won't hold a curl as well. A quick rough-dry with the airflow on medium heat gets your hair to the right moisture level before you switch to the curling technique. Always apply a heat protectant before any thermal styling.
How do you make air-styled curls last longer?
Three things extend curl longevity: finishing with the cool shot button after each section, using a light-hold texturizing spray or mousse before you start, and letting each curl cool completely before touching it. Avoid over-brushing once styling is done. Fine or straight hair types may also benefit from a flexible-hold finishing spray applied after styling to lock in the shape and add frizz control.
Is air styling less damaging than traditional curling irons?
Air styling generally exposes hair to lower direct heat than a traditional curling iron because the Coanda effect does much of the work through controlled airflow rather than a hot barrel clamping the hair. That said, heat damage is still possible at high settings. Using a quality heat protectant, like the CHASKA Moisture Rich Heat Protectant ($24), and choosing the correct temperature for your hair density keeps the risk low.
Should you curl hair inwards or outwards for a natural look?
Curling away from the face on both sides creates the most natural, open look. Curling inward on every section gives a more polished, retro wave. For everyday bouncy curls, alternate the direction section by section, some inward, some outward, which adds volume and prevents the hair from clumping into one large ringlet. Hair density and texture affect how dramatic the difference appears, so experiment on a small section first.
This article was written using GrandRanker