


Styling Thick Hair With Air Tools: 7-Step Guide
Table of Contents
- How to Section Thick Hair for Styling
- Pre-Drying vs. Damp Styling With Air Tools
- Heat Settings and Airflow for Coarse Texture
- Root Lifting and Volume Techniques for Thick Hair
- How to Avoid Heat Styling Damage on Thick Hair
- Best Air Styler for Thick Hair: What to Look For
- Troubleshooting Frizz, Flat Roots, and Styling Failures
- Frequently Asked Questions
Last Updated: September 11, 2026
How to Section Thick Hair for Styling
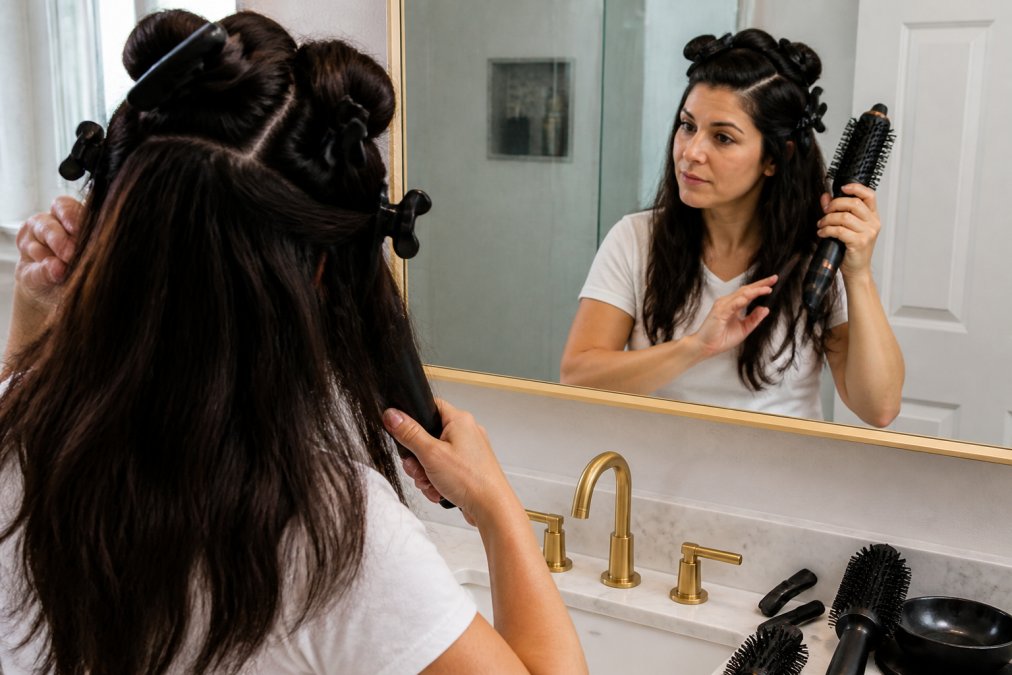
Styling thick hair with air tools starts with sectioning, because dense hair traps moisture unevenly and resists airflow. Divide hair into four quadrants, then split each into sections no wider than 5 centimeters (2 inches) so hot air reaches the hair shaft, not just the surface (the American Academy of Dermatology).
Grabbing too much hair at once is the biggest reason a blowout comes out frizzy on one side and flat on the other. Smaller sections take marginally longer to set up but cut total styling time because you are not re-drying the same strand three times.
Choosing Section Size Based on Hair Density
Match section width to how much hair you actually have. Fine hair works in 5-7 centimeter sections; coarse texture needs 2.5-4 centimeters. If you can still see the sectioning clip from the front, the section is too wide.
Clipping and Tension Basics
Hold each section taut, roughly 45 degrees from the scalp, and let the air tool glide down the strand. Tension creates a smooth finish: slack hair blows around and tangles, over-tensioned hair snaps. Aim for firm but comfortable.
Pre-Drying vs. Damp Styling With Air Tools
Pre-drying removes about 70 to 80 percent of moisture before you attach a styling head (PubMed). It matters more for thick hair than any other type, because dense strands hold water in the core long after the surface feels dry. Skip it and you cook the outside while the inside stays damp.
The practical sequence:
- Towel-dry gently to remove surface water.
- Rough-dry with the concentrator nozzle until hair is damp, not dripping.
- Switch to your styling attachment for the finish.
Styling damp hair with an air tool works, but only after that rough-dry pass. Going straight from soaking wet to a round brush attachment damages the outer cuticle while the inner shaft is still wet.
Heat Settings and Airflow for Coarse Texture
Coarse texture needs moderate heat and high airflow, not maximum heat. Airflow velocity does the drying; heat only sets the shape. Crank the temperature to the top and you scorch the cuticle before the interior dries.
A workable starting point for thick, coarse hair: medium-high heat, highest fan speed, and a thermal protection spray on damp hair beforehand. Ceramic heating distributes warmth more evenly, reducing hot spots. Drop to low heat for the last pass on each section to close the cuticle and add shine.
Root Lifting and Volume Techniques for Thick Hair
Root lift comes from directing airflow against the natural fall of the hair, not from product alone. Position the tool at the root, nozzle pointing down the shaft, and lift the section upward as you dry. Thick hair holds volume well once set, so a few seconds of counter-directional airflow is usually enough.
Work in this order: roots first, mid-lengths second, ends last. If you dry the ends before the roots, the weight of the finished ends pulls volume flat before you get there.
Using the Cool Shot to Set Volume
The cool shot is the step almost everyone skips. Once a section is dry and lifted, hit it with cold air for 5 to 10 seconds while holding the lift. Cool air sets the hair shaft in its new position, and that set lasts through humidity far better than heat alone.
How to Avoid Heat Styling Damage on Thick Hair
Preventing heat damage on thick hair means limiting passes, not just temperature. Dry every section in one or two passes with correct sectioning and airflow. Repeated passes over the same strand cause more cuticle damage than a single higher-heat pass (peer-reviewed research).
Three habits that protect thick hair:
- Apply a heat protectant to damp hair before any tool touches it.
- Keep the tool moving; never park it on one spot.
- Let each section cool completely before brushing it out.
Hair Porosity and Moisture Retention
Porosity determines how fast your hair absorbs and loses moisture, and it changes how you should set your heat. High-porosity hair soaks up water quickly and releases it just as fast, so it dries faster but frizzes sooner. Low-porosity hair holds moisture in the core, feeling dry on top while staying damp underneath.

Test yours with a water droplet on a clean strand: if it absorbs within a minute or two, you are high porosity; if it sits on the surface, low porosity. High-porosity hair benefits from a leave-in moisturizer before styling; low-porosity hair needs lighter products and more drying time.
Best Air Styler for Thick Hair: What to Look For
The best air styler for thick hair combines high airflow velocity, adjustable heat settings, and attachments sized for dense sections. Airflow matters more than peak temperature, because moving air dries the hair shaft without scorching it.

Check these specifications before buying:
| Feature | Why It Matters for Thick Hair |
|---|---|
| Airflow velocity | Dries the core, not just the surface |
| Adjustable heat | Lets you drop to low heat for the finishing pass |
| Cool shot | Sets volume and smooths the cuticle |
| Barrel attachment size | Wider barrels suit dense, long sections |
| Vented brush head | Reaches through layers without tangling |
A multi-styler that dries, straightens, and curls in one device removes the need to switch between a separate dryer and flat iron, meaning less cumulative heat exposure. The CHASKA Air Styler pairs twin turbo fans with a patented heat plate for exactly this reason, built to handle all hair types with a single tool. Pair it with the CHASKA Moisture Rich Heat Protectant as a pre-styling primer.
Matching Attachments to Hair Density and Length
Attachment choice is the variable most thick-hair guides skip, and it determines whether airflow reaches the core of a section. A tool with strong airflow and the wrong attachment performs worse than a weaker tool with the right one.
Round brush attachments. Diameter drives the result. A 1.5-inch barrel suits shoulder-length thick hair that needs bend at the ends. A 2-inch barrel is the workhorse for mid-length to long thick hair, holding more strands per pass without tangling. A 2.5-inch or larger barrel is for long, coarse hair where you want smooth volume rather than curl definition. If your hair is dense and past your shoulder blades, going below 1.5 inches means re-wrapping the same section repeatedly, and repeated wrapping is where friction damage accumulates.
Concentrator nozzle. This is the attachment for the rough-dry phase, not the finish. A narrow concentrator focuses airflow into a tight stream that pushes through the outer layer of dense hair to reach the damp core. Point the nozzle down the shaft at a 45-degree angle. Without one, a diffuser scatters air across the surface and leaves the interior wet, the most common reason thick hair takes 40 minutes to dry instead of 15.
Paddle and vented brush heads. These are for the mid-lengths and ends once the roots are set. The vented back lets air pass through the bristles instead of bouncing off the hair surface, which matters when working through three or four layers of dense strands. A paddle head covers more surface area per pass, making it faster for straightening thick hair; a vented round brush is slower but gives more control at the ends.
Diffuser. If your thick hair is also curly or wavy, a diffuser cup with long prongs reaches the scalp and lifts the root without disrupting the curl pattern. Short-prong diffusers sit on top of dense hair and leave the underlayers damp.
Airflow Velocity vs. Peak Temperature
A common pattern in thick-hair styling is buying the tool with the highest advertised heat setting and discovering it still takes forever. Heat does not penetrate dense hair quickly; moving air does. Look for airflow rated in cubic feet per minute or described as high-velocity, and treat the maximum temperature as a ceiling you rarely touch. Tools with brushless motors sustain airflow better under the load of thick hair, because a standard motor slows when dense strands block the intake.
Troubleshooting Frizz, Flat Roots, and Styling Failures
Frizz on thick hair almost always traces back to one of three causes: sections that were too wide, heat that was too high, or a cuticle never sealed with cool air. Fix the sectioning first, because it solves the other two more often than not.
Flat roots after styling. You dried the ends before the roots, or you skipped the cool shot. Re-lift at the root with counter-directional airflow and set with cold air.
Frizz at the mid-lengths. The section was too wide and the inner layers stayed damp. Re-section narrower and dry in one clean pass per section.
Curls that fall out within an hour. Thick hair needs longer cooling time than fine hair. Wrap the section, let it cool fully, then release.
Tangling around the brush. Too much hair on the barrel. Halve your section size.
A Diagnostic Order for Thick-Hair Failures
Most guides list fixes in no particular order, which is why people try three and still get the same result. Work through the causes in this sequence, because each step rules out the one above it:
- Section size. If any section is wider than the barrel of your attachment, nothing downstream will fix the finish. Re-section before changing anything else.
- Moisture state at the root. Press a dry paper towel against the scalp at the nape. If it comes away cool or damp, the core is still wet and no amount of heat will set the shape. Return to the rough-dry phase.
- Airflow direction. Confirm the nozzle points down the hair shaft, from root to end. Airflow aimed upward or across the section lifts the cuticle and creates surface frizz even on hair that was sectioned correctly.
- Heat level. Only after the first three are correct should you adjust temperature. If the section is dry, correctly sized, and still rough, drop one heat setting rather than raising it.
- Cool-set. Finish every section with cold air while holding the shape. Skipping this step is the most common cause of volume that collapses within the hour.
Frizz-Prone Thick Hair: A Specific Workflow
Some thick hair does not just dry slowly, it puffs outward the moment airflow touches it, and no amount of product holds it down. This needs a different sequence than the standard blowout routine.
Frizz-prone thick hair typically has a raised cuticle and uneven porosity, so the outer layer dries and lifts while the underlayers stay damp and heavy. The result is a style that looks smooth for twenty minutes, then expands.
The workflow that addresses this:
- Start with the underlayers, not the canopy. Most people dry the visible top layer first because it is easiest to reach. Flip the head or clip the canopy up and dry the bottom layers to 80 percent before touching the top. If the underlayers are still wet when you finish the canopy, their moisture migrates outward and re-frizzes the surface.
- Use downward airflow exclusively on the canopy. No upward passes, no scrunching, no diffuser on the top layer. Every upward motion lifts the cuticle on hair that is already prone to lifting.
- Apply product in two stages. A leave-in or heat protectant on damp hair before drying, then a light finishing oil or serum only on the ends after the section is fully dry. Oil on damp frizz-prone hair traps moisture unevenly and worsens the puffing.
- Extend the cool-set to 15 seconds per section. Frizz-prone hair needs a longer cold-air set than average thick hair because the cuticle takes more time to lay flat.
- Do not brush between sections. Brushing a warm, freshly dried section disturbs the cuticle before it has cooled. Finger-comb or wait.
Frequently Asked Questions
Does an air styler actually work on thick hair?
Yes, but thick hair needs the right approach. Air tools with high airflow velocity and ceramic heating work best because they dry and shape at the same time. Section hair into smaller pieces than you would for fine hair, and pre-dry to about 80% before attaching a barrel or brush. This gives the air tool less wet hair to manage and produces a smoother finish with less frizz.
Do I need to dry my hair before using an air styler?
Pre-drying to roughly 80% removes enough surface moisture that the air tool can focus on shaping instead of just drying. For thick or coarse texture, this step cuts total styling time and reduces heat exposure. Towel-dry gently, then air-dry for a few minutes or use the dryer attachment on medium heat before switching to a styling barrel.
How do I avoid heat styling damage when using air tools on thick hair?
Keep heat settings on medium for most of the styling session and reserve high heat only for stubborn sections. Always apply a heat protectant before styling, and keep the tool moving rather than holding it in one spot. Thick hair has more layers, so heat penetrates unevenly. Using the cool shot to set each section also lowers overall heat exposure while locking in the shape.
What should I look for in the best air styler for thick hair?
Look for high airflow velocity, multiple heat settings including a cool shot, and attachments sized for dense sections. A tool with a vented brush or large barrel handles coarse texture better than small attachments. The CHASKA Air Styler uses twin turbo fans and a patented heat plate to dry, straighten, and curl in one pass, which cuts styling time for thick hair.